A good pool-deck resurfacing job should look more like a controlled surface-preparation and coating system than a quick paint project. The exact steps vary by manufacturer, but the sequence should make sense: inspect, diagnose, prepare, repair, bond, build the new surface, finish it, cure it, and document what was used.
The process in one line
Inspection → cleaning/removal → profiling → crack/patch repair → bonding/primer → base/overlay → texture/color → sealer/topcoat → cure → maintenance instructions. Some systems combine or omit steps, but the contractor should be able to explain why.
1. Inspect the concrete before choosing the finish
Identify cracks, vertical displacement, hollow areas, spalls, ponding, drainage issues, old coatings, sealers, contamination, and repairs. The objective is to decide whether the slab is a suitable substrate and what preparation the new system will require.
2. Identify what is already on the deck
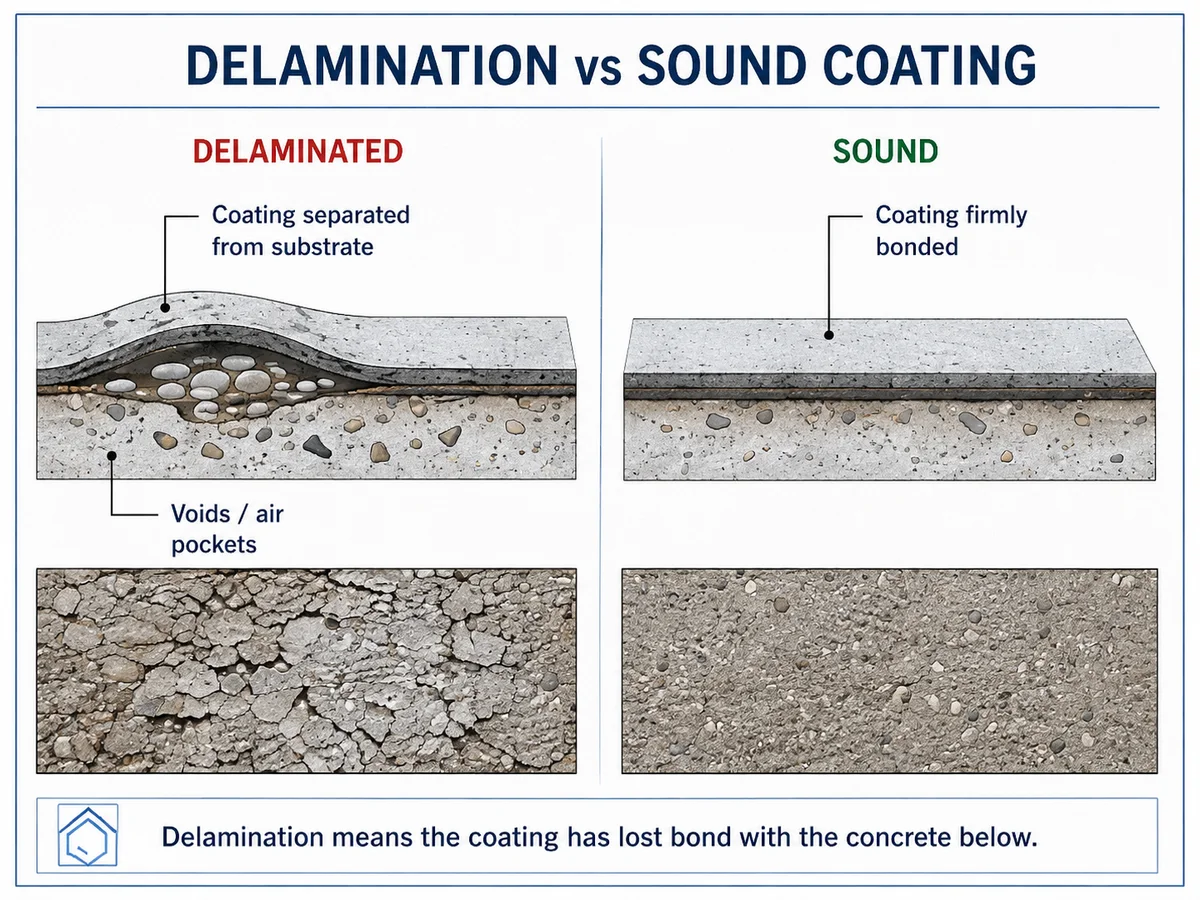
An old coating that is firmly bonded may be handled differently from a peeling, chalky, unknown, or incompatible film. Some manufacturers publish primers for sound previously painted concrete; other resurfacing systems require a different profile or removal strategy.
3. Clean and profile the surface
ICRI treats concrete surface preparation as a system-selection problem: the desired profile depends on the substrate and the material being installed. Depending on the deck, preparation can include grinding, blasting, stripping, detergent/degreaser cleaning, pressure washing, or other manufacturer-approved methods.
4. Repair cracks and damaged concrete
Cracks should be classified rather than merely hidden. Static hairline cracks, larger nonmoving cracks, and joints or cracks with ongoing movement are different problems. Spalls and hollow concrete also need to be addressed before the decorative system covers them.
5. Apply the specified bonding layer—if the system requires one
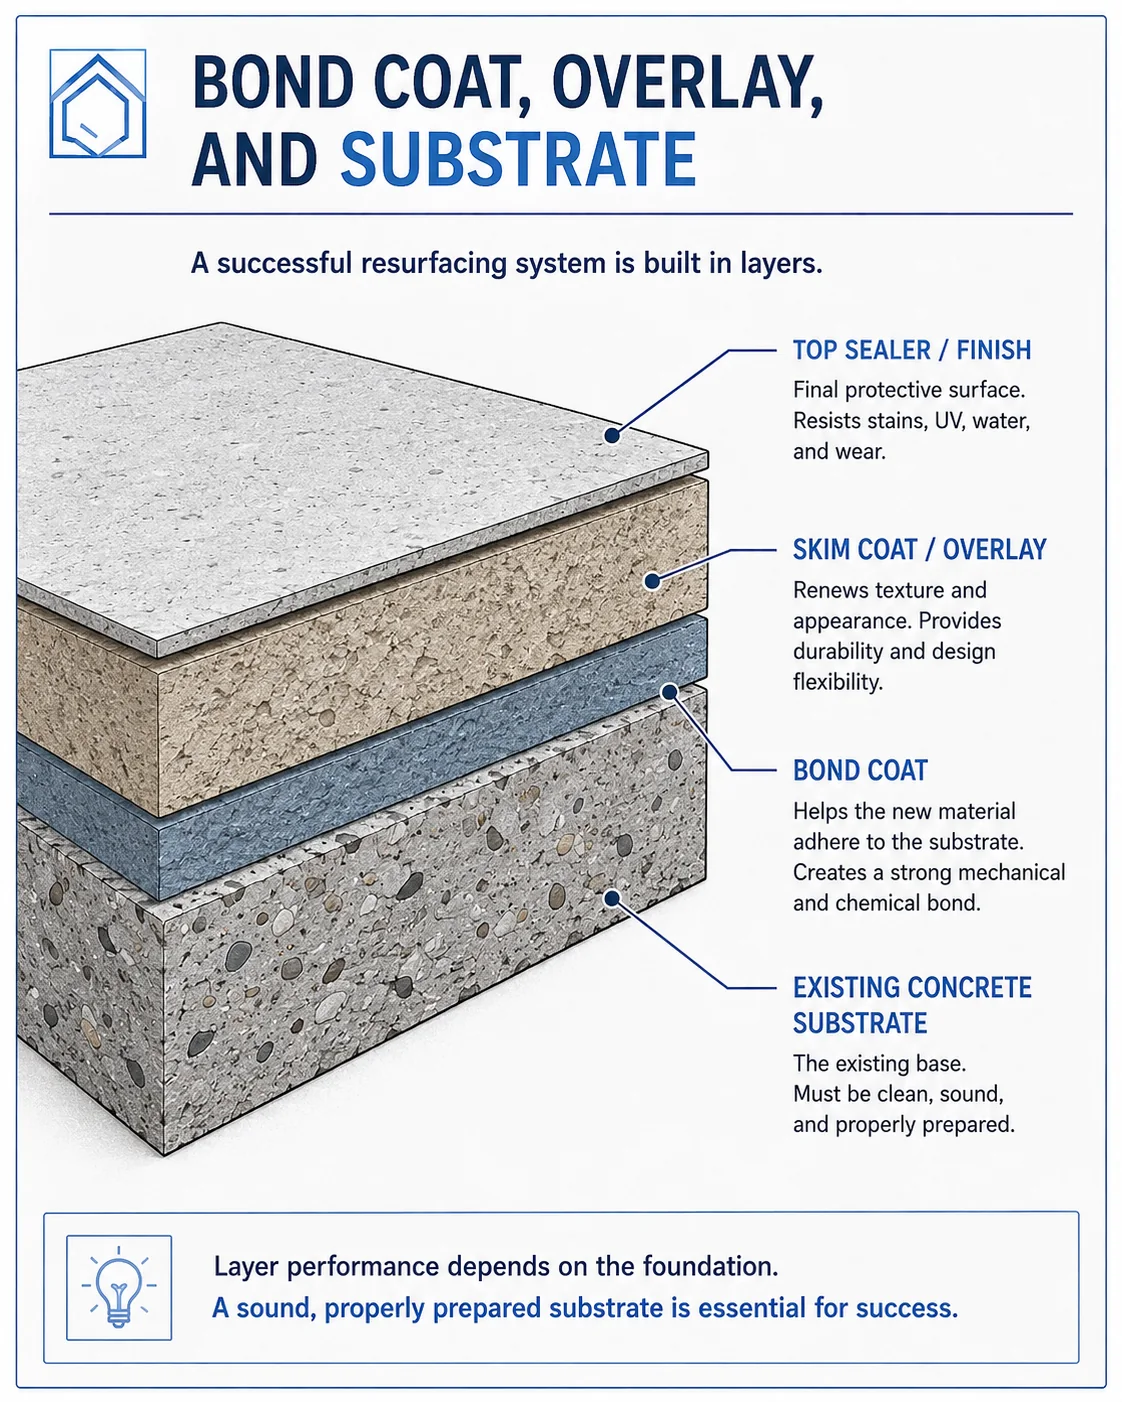
This is an area where systems differ. ICT’s standard Deck Mix is designed to be combined with ICT Liquid Resin, while Deck Mix H₂O is a one-part water-mix product. Other systems may use a dedicated primer, a bonding slurry, a dry polymer already incorporated into the bag, or another manufacturer-specific approach.
Field practice does not always match the written instructions. If a distributor or contractor substitutes another bonding product or omits a specified component, that does not automatically mean the choice is wrong—but it should be recognized as a deviation and explained.
6. Install the base/overlay and texture
Cementitious systems may receive a base layer followed by spray texture, knockdown, hand trowel, stencil, scoring, or another decorative treatment. Thin coating systems may instead proceed through primer and multiple coating layers. Ask what each layer is supposed to do.
7. Add color, traction, and protective finish
Color may be integral to the overlay, applied as a stain/coating, or built from multiple layers. Wet traction may come from the texture itself, a broadcast aggregate, an additive mixed into a sealer, or a combination. The final sealer/topcoat can strongly influence gloss, cleaning, water behavior, and how the surface feels underfoot.
8. Respect cure and weather windows
Do not confuse “dry enough to touch” with “ready for furniture, standing water, or normal pool use.” Product data sheets often specify separate recoat, pedestrian, heavy-use, rain, and water-exposure times. Southwest Florida summer weather makes this worth planning in advance.
9. Leave the homeowner with product names and maintenance instructions
A homeowner should know what was installed. Save the manufacturer, product names, colors, batch/lot information when available, technical data sheets, warranty documents, and contractor invoice. Years later, that information can determine whether a compatible repair or recoat is straightforward or becomes detective work.
For timing, see Pool Deck Resurfacing Cure Time. If the deck is already painted, see Can You Resurface a Painted Pool Deck?.